Welding table
It was time for an actual welding table. Taking the learnings from the first table with retractable legs, I decided to weld a bigger one that would be static, adjusted for my height, and fully metal.
Idea
The idea was simple: create the main workstation to place at the center of the shop. The requirements were there but ever-evolving:
- Fully metal table so I can keep one electrode attached to the leg and have the top that conducts electricity to the welded object.
- Strong enough so I can mount different types of vises and hammer on them.
- Shelf to mount the welder and have some storage space below.
Challenge
I was still buying square steel pipes cut to size from the same metalworking shop. The overall materials were not too expensive, but I had no idea what to use for the top and have it conduct electricity. When they suggested to have a huge metal sheet cut to dimensions and laid on top of the construction, it turned out to be too much money for a simple project and I could not fit it into my car.
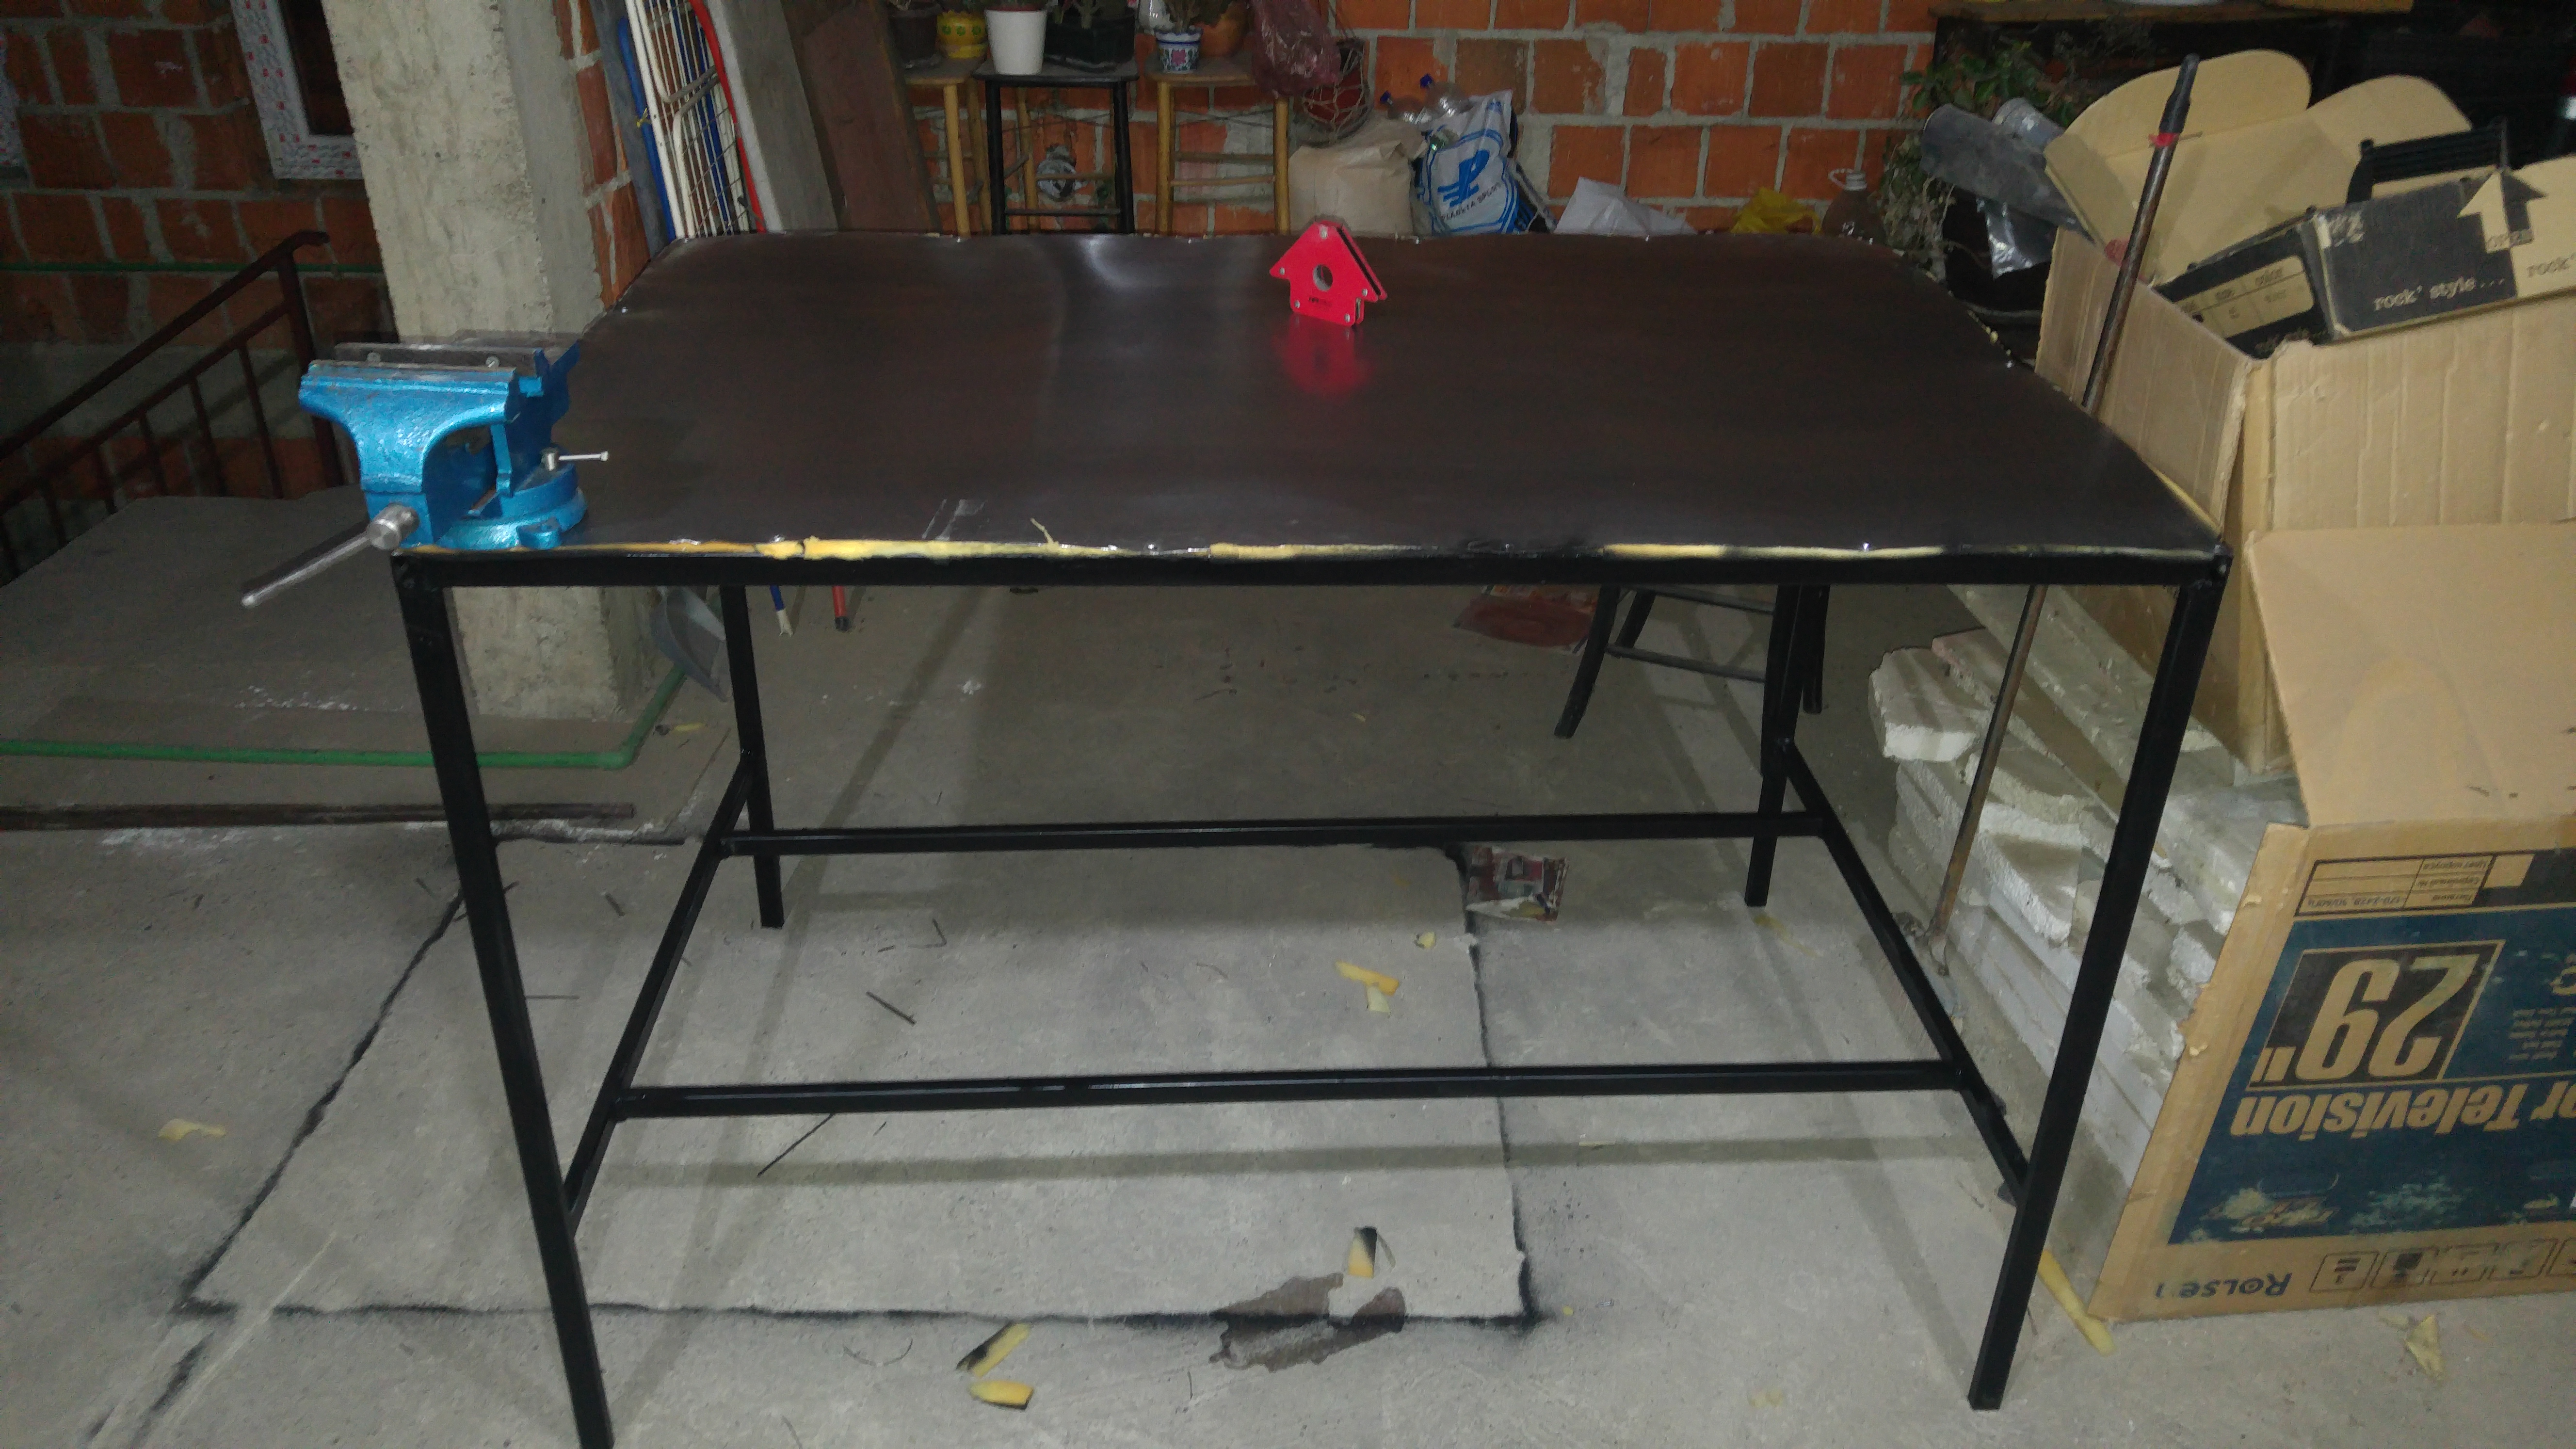
I did have some leftover galvanized sheet metal rolled up at the back from the time we had built the house. It was very thin—used for the roof if I remember correctly. I tried whether I could weld on it and it worked.
Outcome
It was rather effortless to weld the pipes. By then I had learned how to prepare the joints with the angle grinder. I made the ends oblong so the joints had little canals to make a stronger weld. 90 degree magnetic welding clamps were also incredibly helpful. These are a must-have in any welding shop.
I had previously tested what the easiest way to protect the steel from corrosion would be. Spray in a can again! Worked remarkably well and the steel stayed protected for years. It probably took me two passes with the spray, and it dried fast. Amazing!
The galvanized steel top ended up attached with the self-drilling steel screws. Easy to use—you just need a screw drill. The one downside with the reused sheet of galvanized steel was that it was too thin and it made a horrible racket when I hammered on it. So I used some fireproof spongy material I had lying around. I think it had been used for isolation.
At the corner, I managed to mount the vise that could rotate. And down the line I ended up making makeshift vises to use as welding templates—so I was happy!
Learnings
The table served the purpose, it was big enough to place huge pieces on top of it, the lighting was better, and oh my God—did my back thank me. The welder ended up on the lower pipes below the table. These became a shelf in the following years and could hold a lot of tools.
What I would do differently nowadays:
- I'd spend the money to get the 2-3mm thick metal sheet for the top. I'd create a mesh of holes over the entire piece and make them big enough so I could mount welding clamps and vise mechanisms.
- I'd weld steel rods along the edge to be able to quickly mount the tool—blacksmithing style!
Apart from the top, which was reused material, the dimensions and the positioning worked out perfectly for me. I used this table for years. Sadly, during the move I had to cut it into pieces again since it could not fit down the hallway. Maybe there's a lesson in there as well. :)
From there, welding started being even more of a delight!